An email group, also known as a distribution list, lets you send messages to multiple people at once without manually typing every address. It is one of Outlook’s most practical tools for saving time, especially for teams managing projects, client updates, or internal communication.
Creating an email group helps ensure everyone stays informed and aligned, whether you are coordinating with departments or sharing updates with clients. In this guide, you will learn how to create, name, use, and manage email groups in Outlook across desktop, web, and mobile.
How to make an email group in Outlook (desktop)
If you are using Outlook for Microsoft 365 or Outlook 2021, 2019, or 2016 on desktop, creating an email group takes just a few clicks. The desktop version offers the most flexibility, allowing you to manage large teams, import contacts from your address book, and customize member details directly within Outlook. Follow the steps below to build a contact group that keeps your communication clear, fast, and consistent.
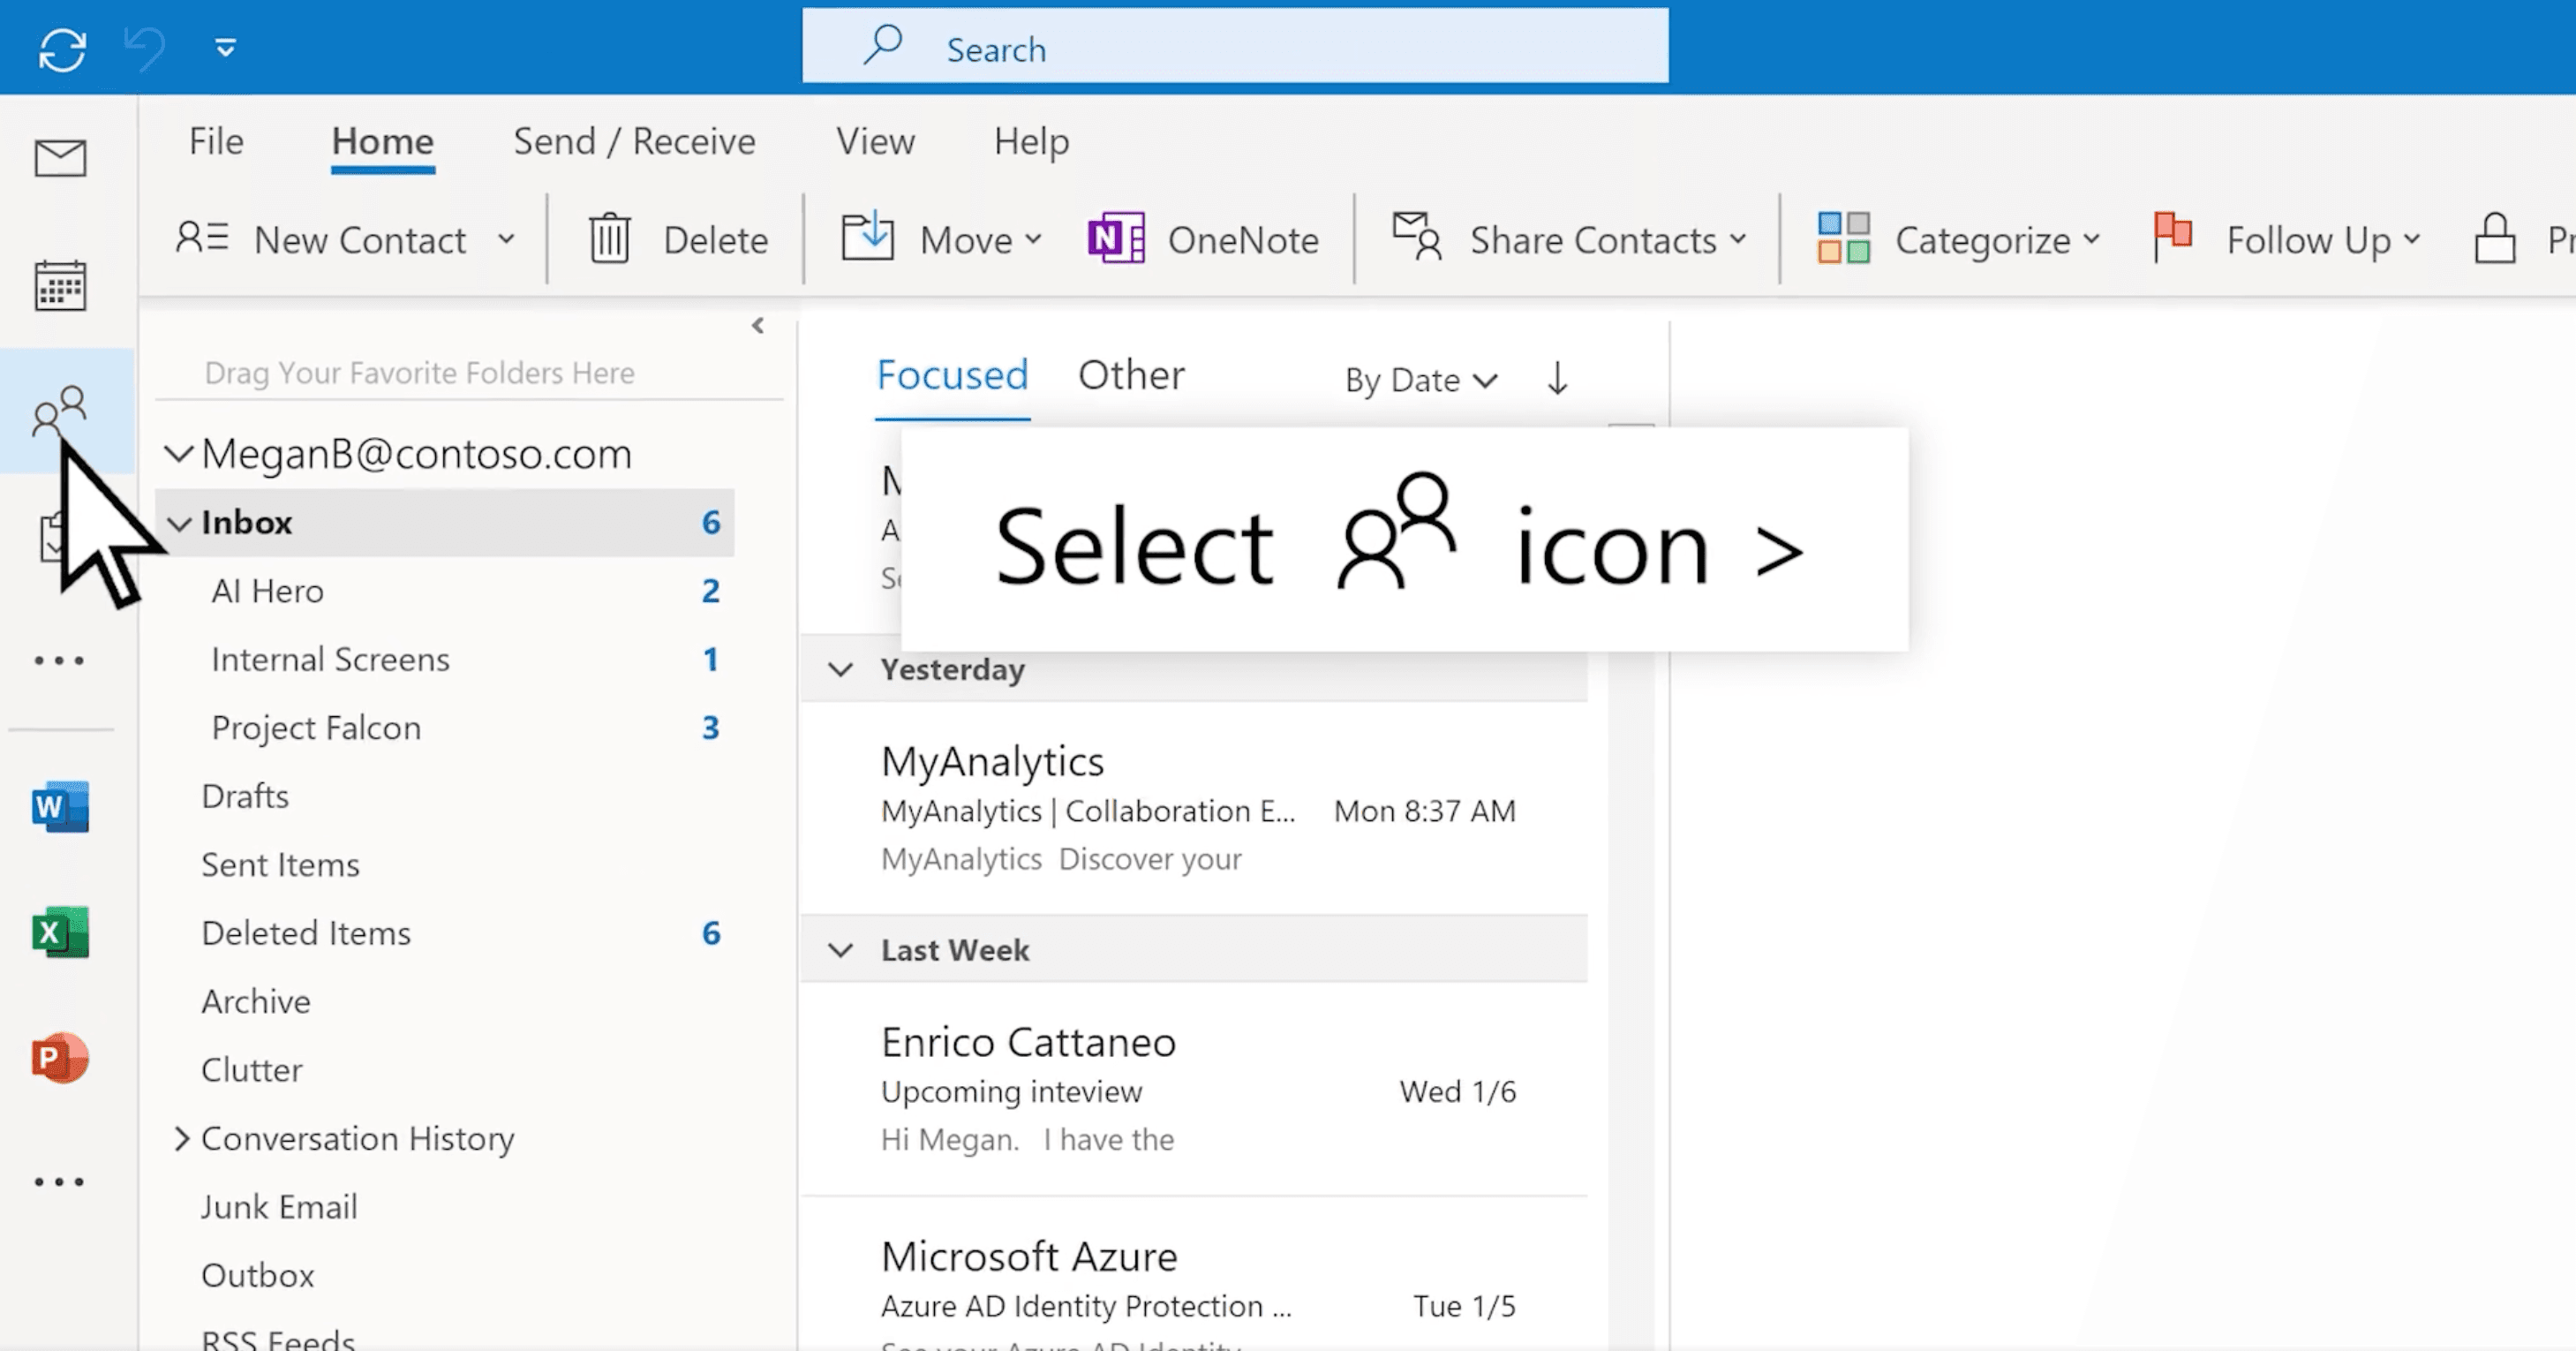
1. Open the People tab
Open Outlook and look for the People icon in your navigation pane on the left. Select it to switch to your Contacts view, where you can create and manage your contact groups.
Fyxer organizes your inbox and drafts replies in your voice.
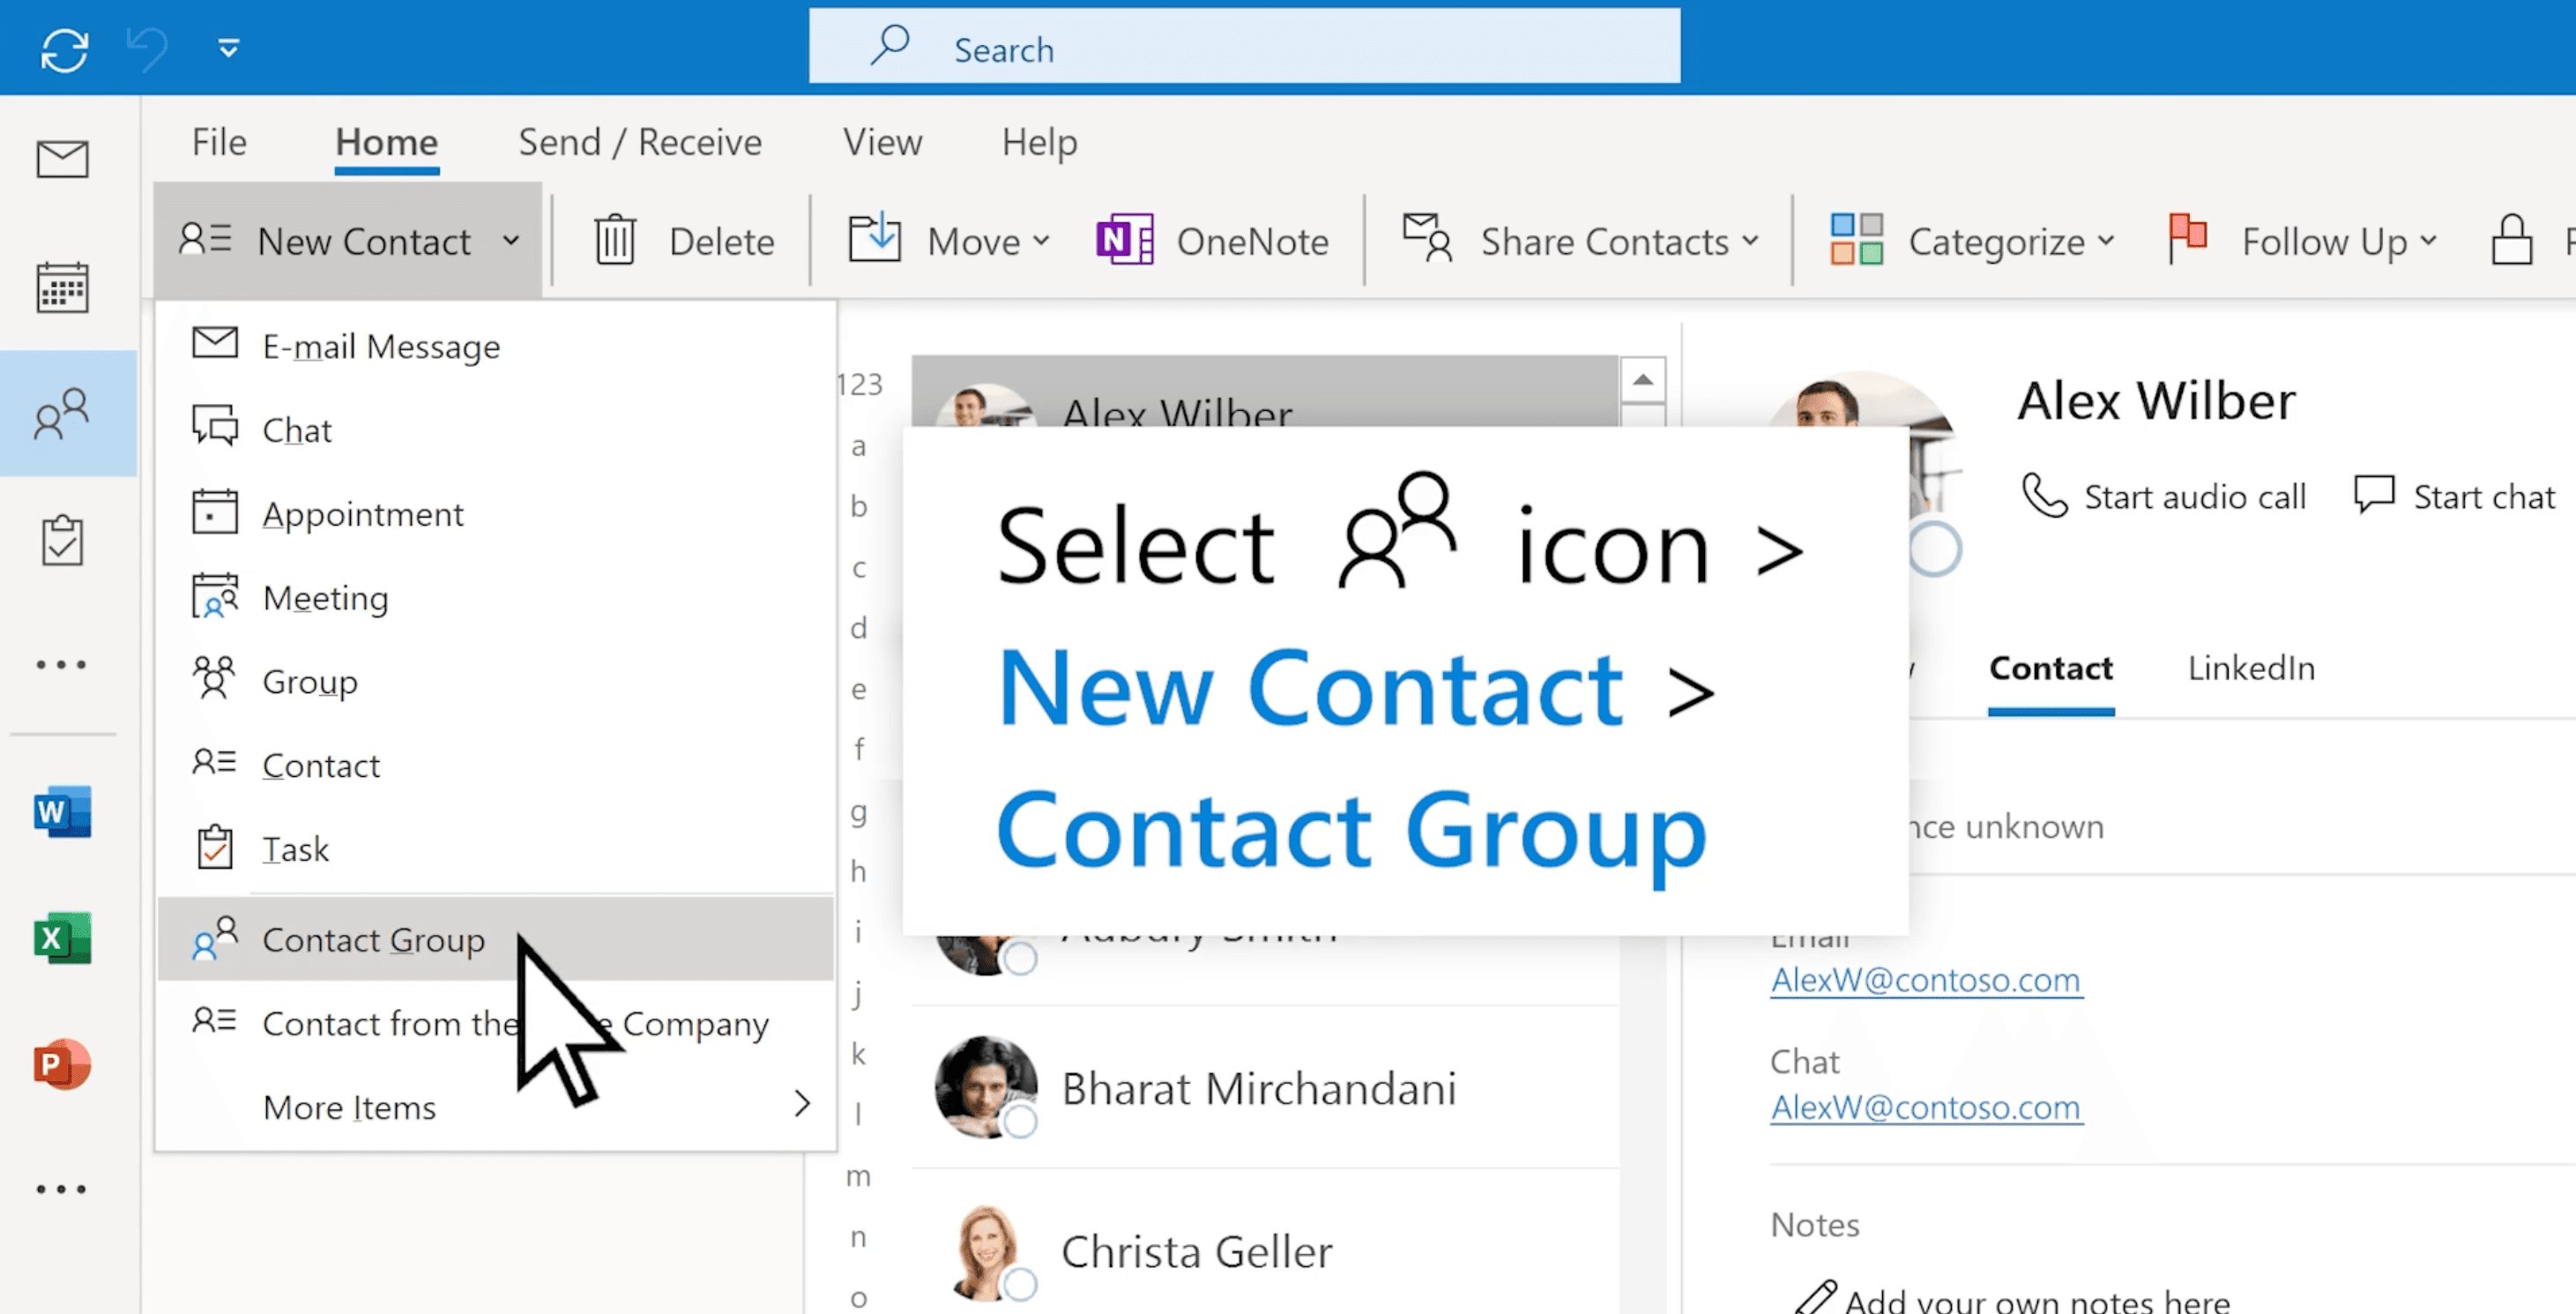
2. Create a new contact group
From the toolbar at the top, select New Contact →New Contact Group.
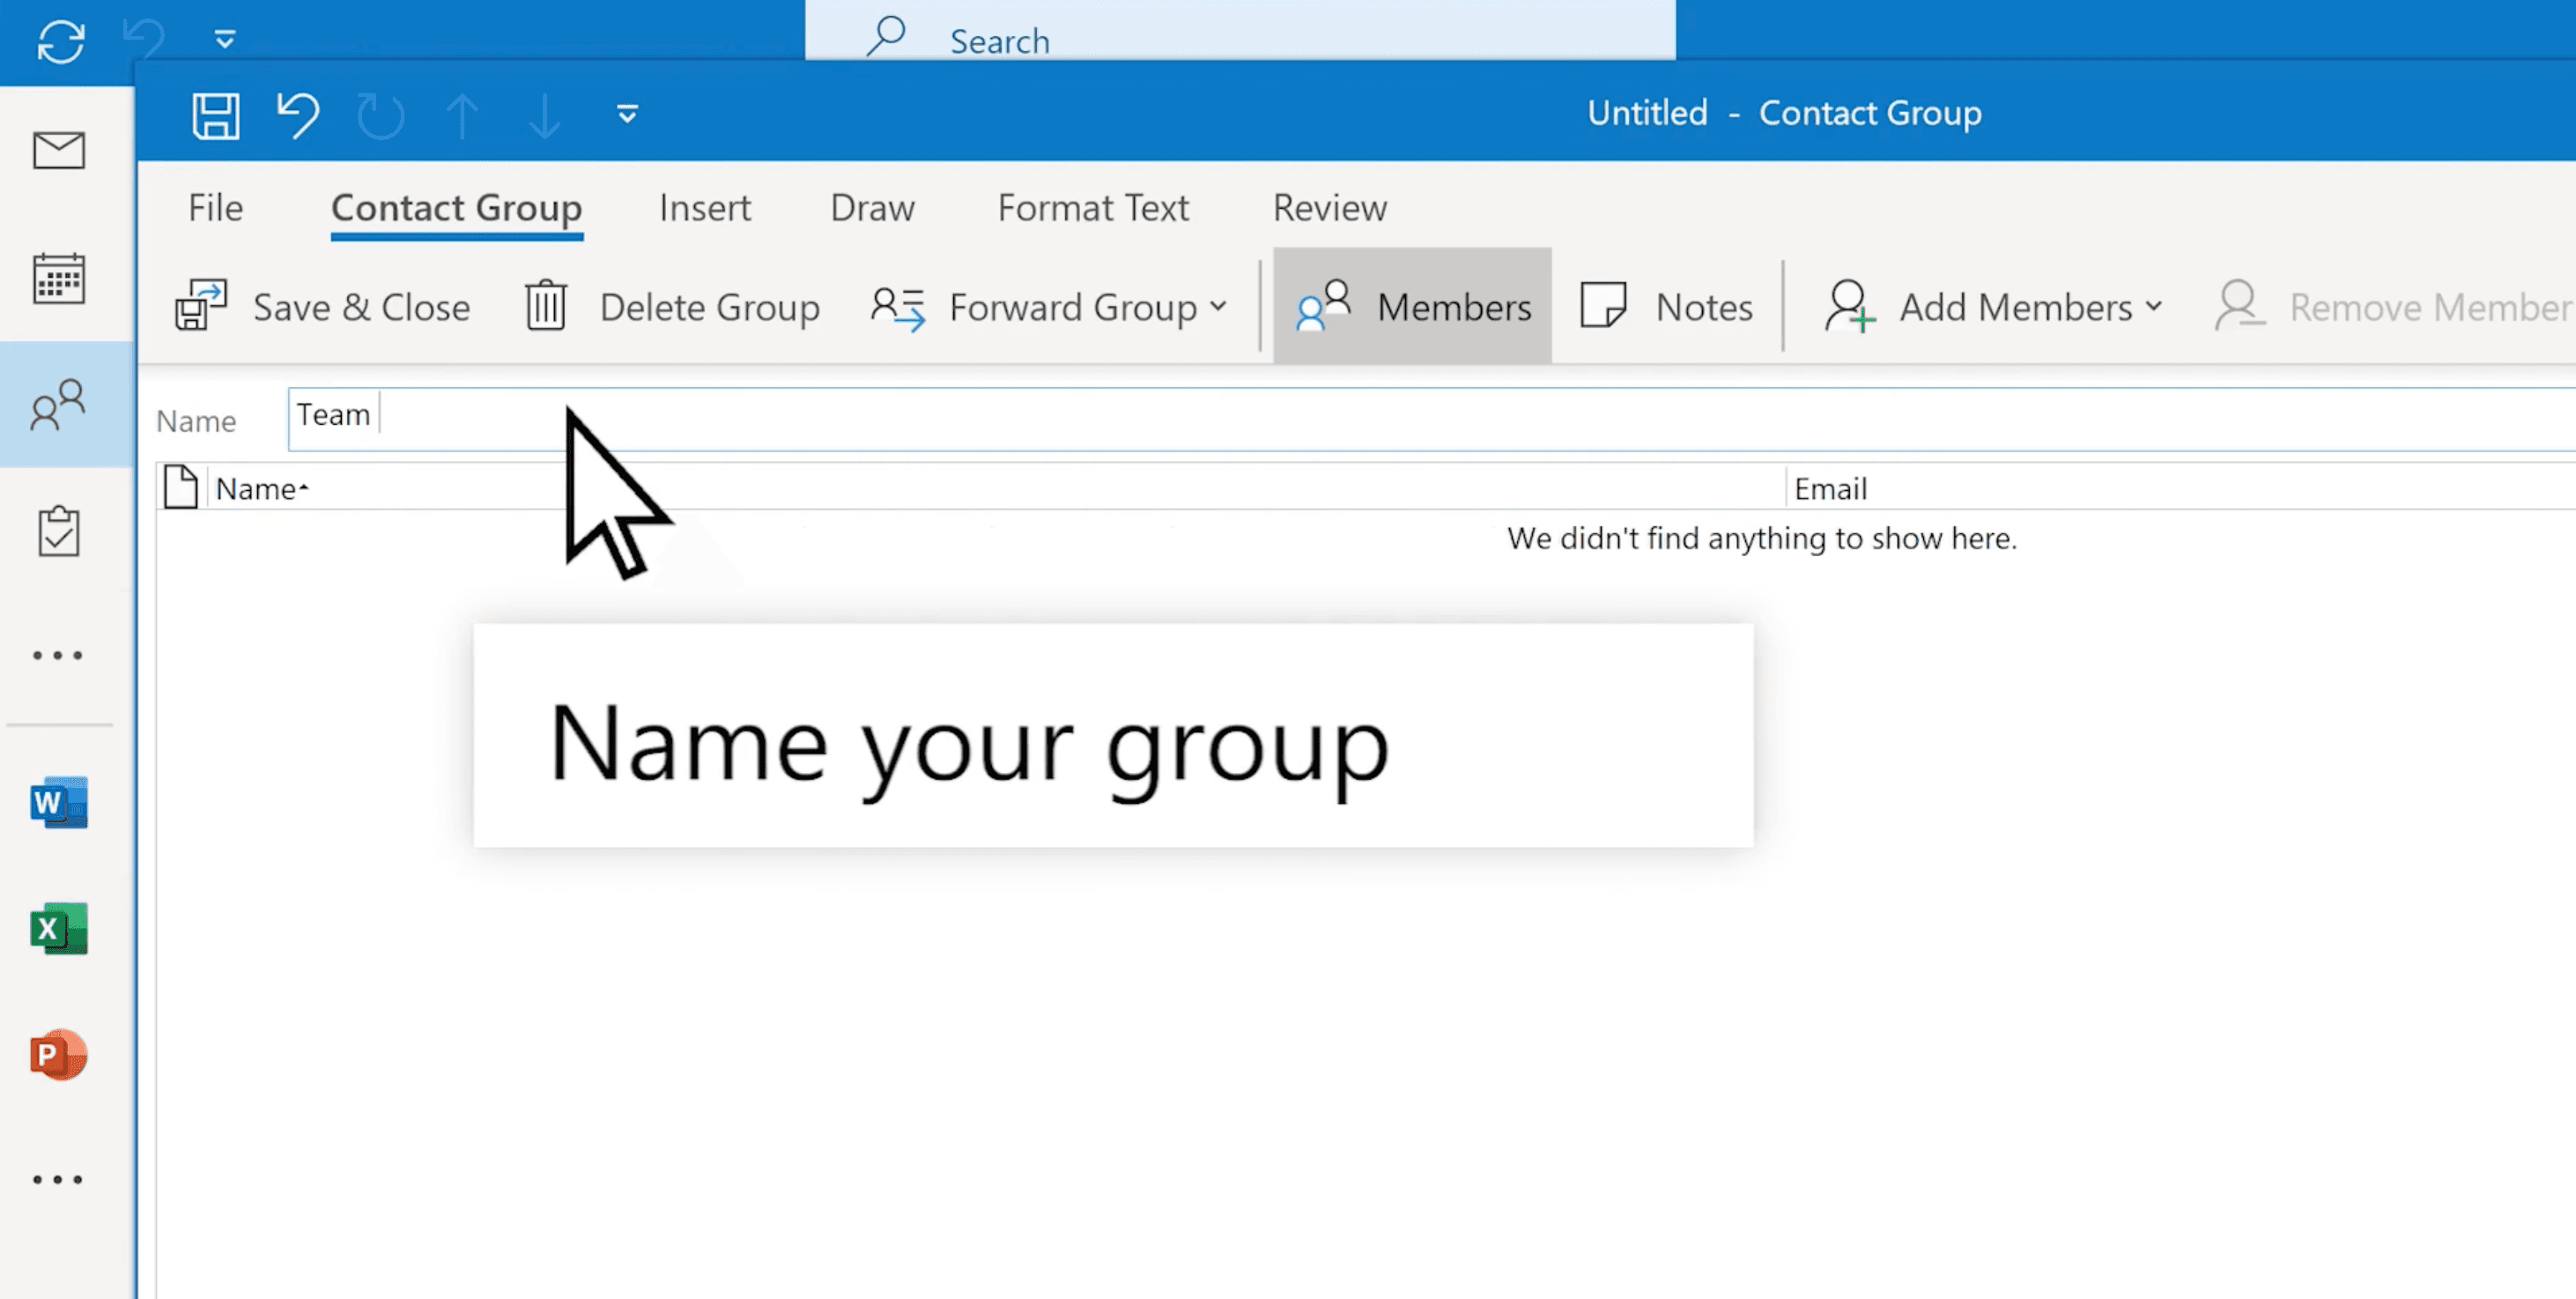
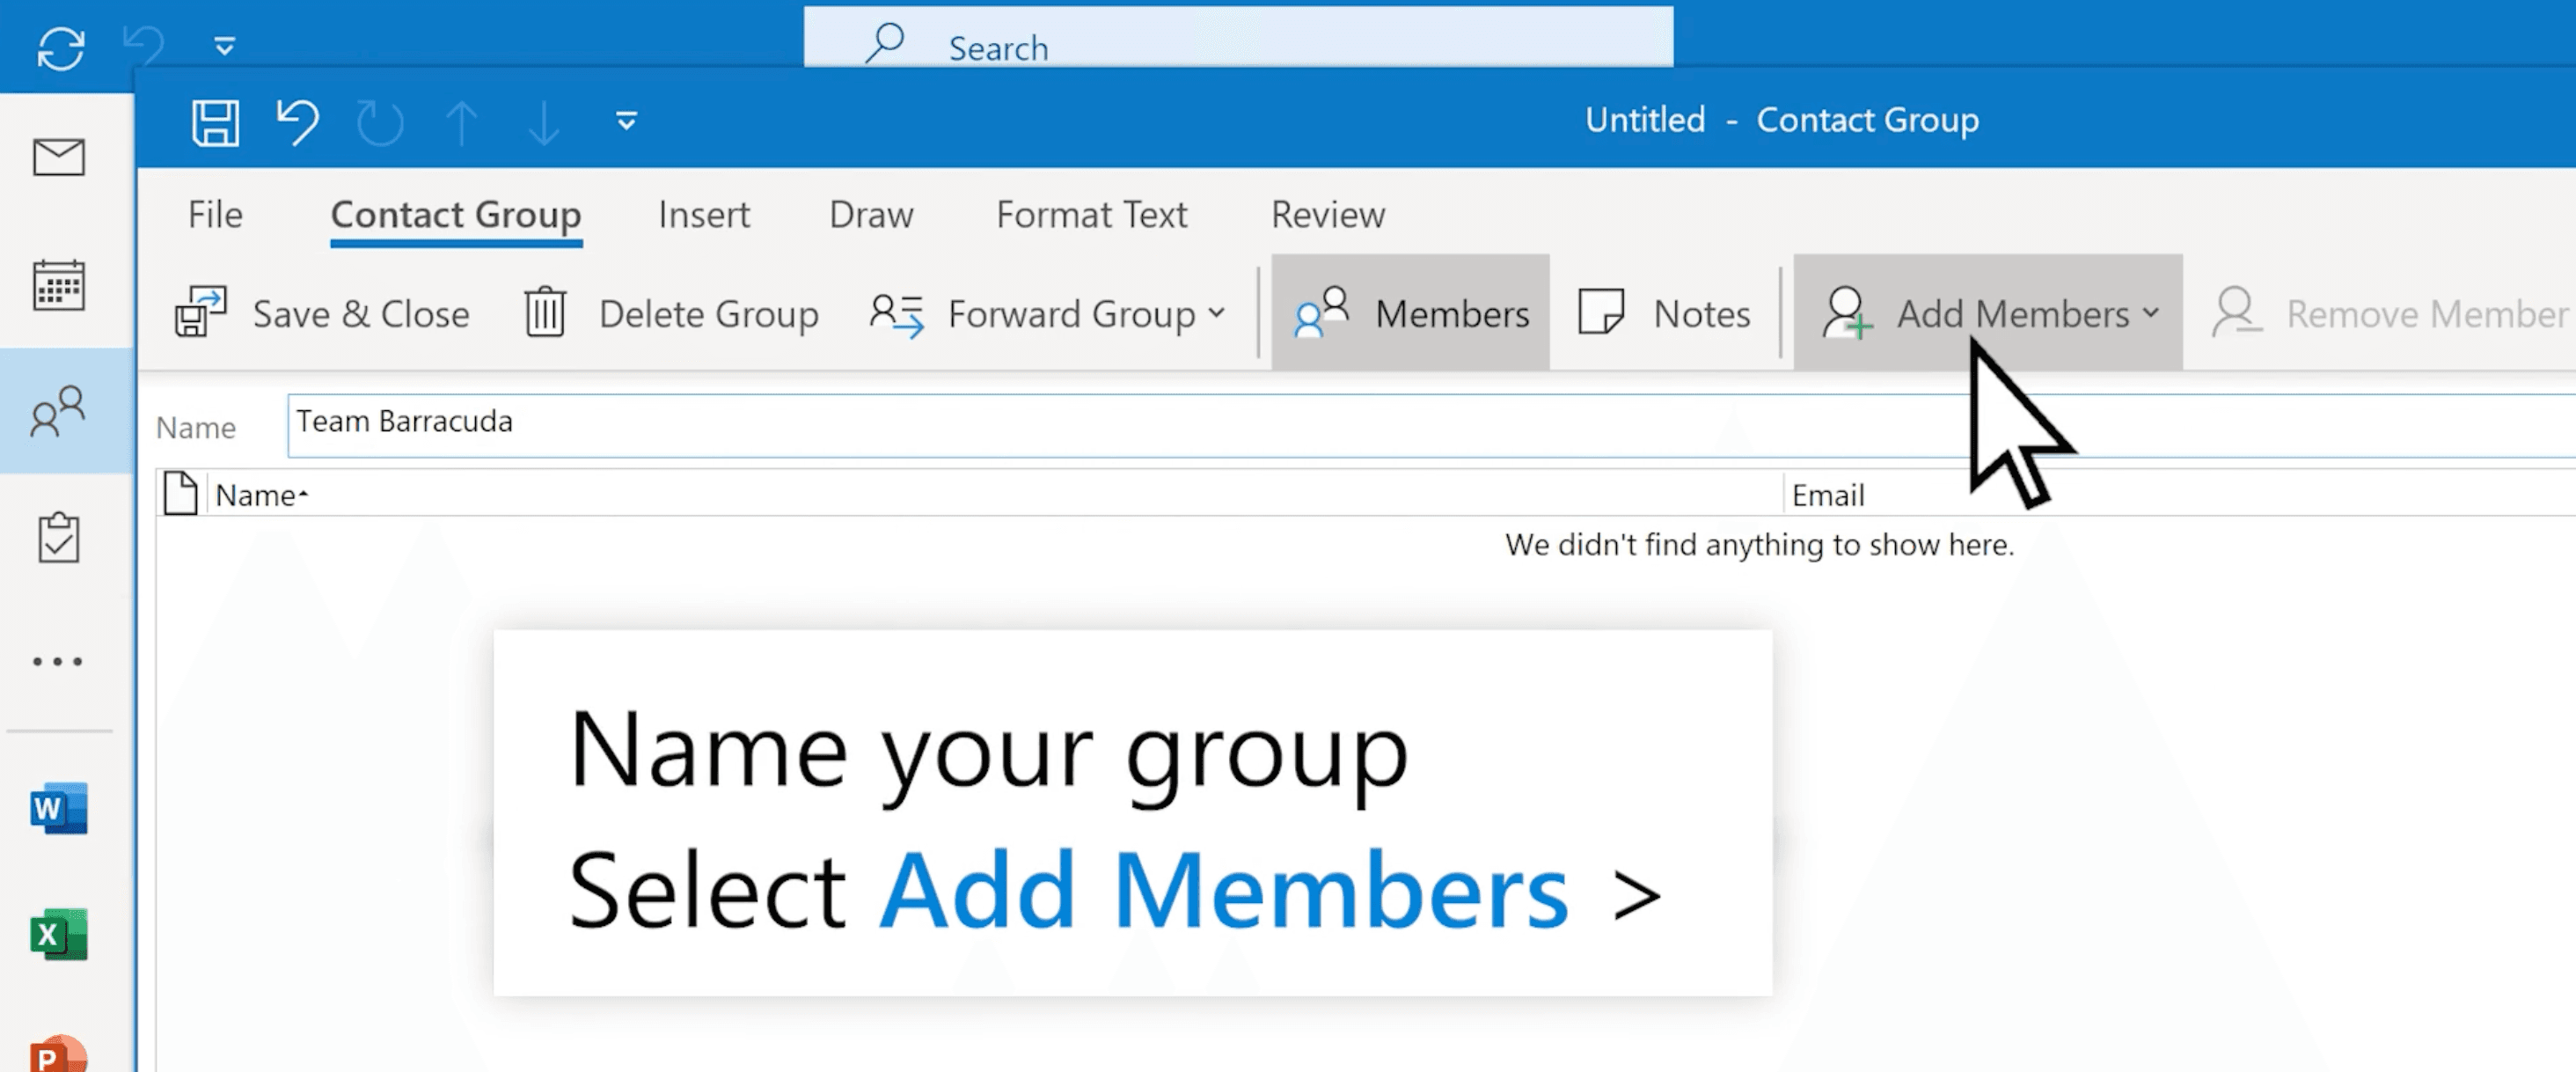
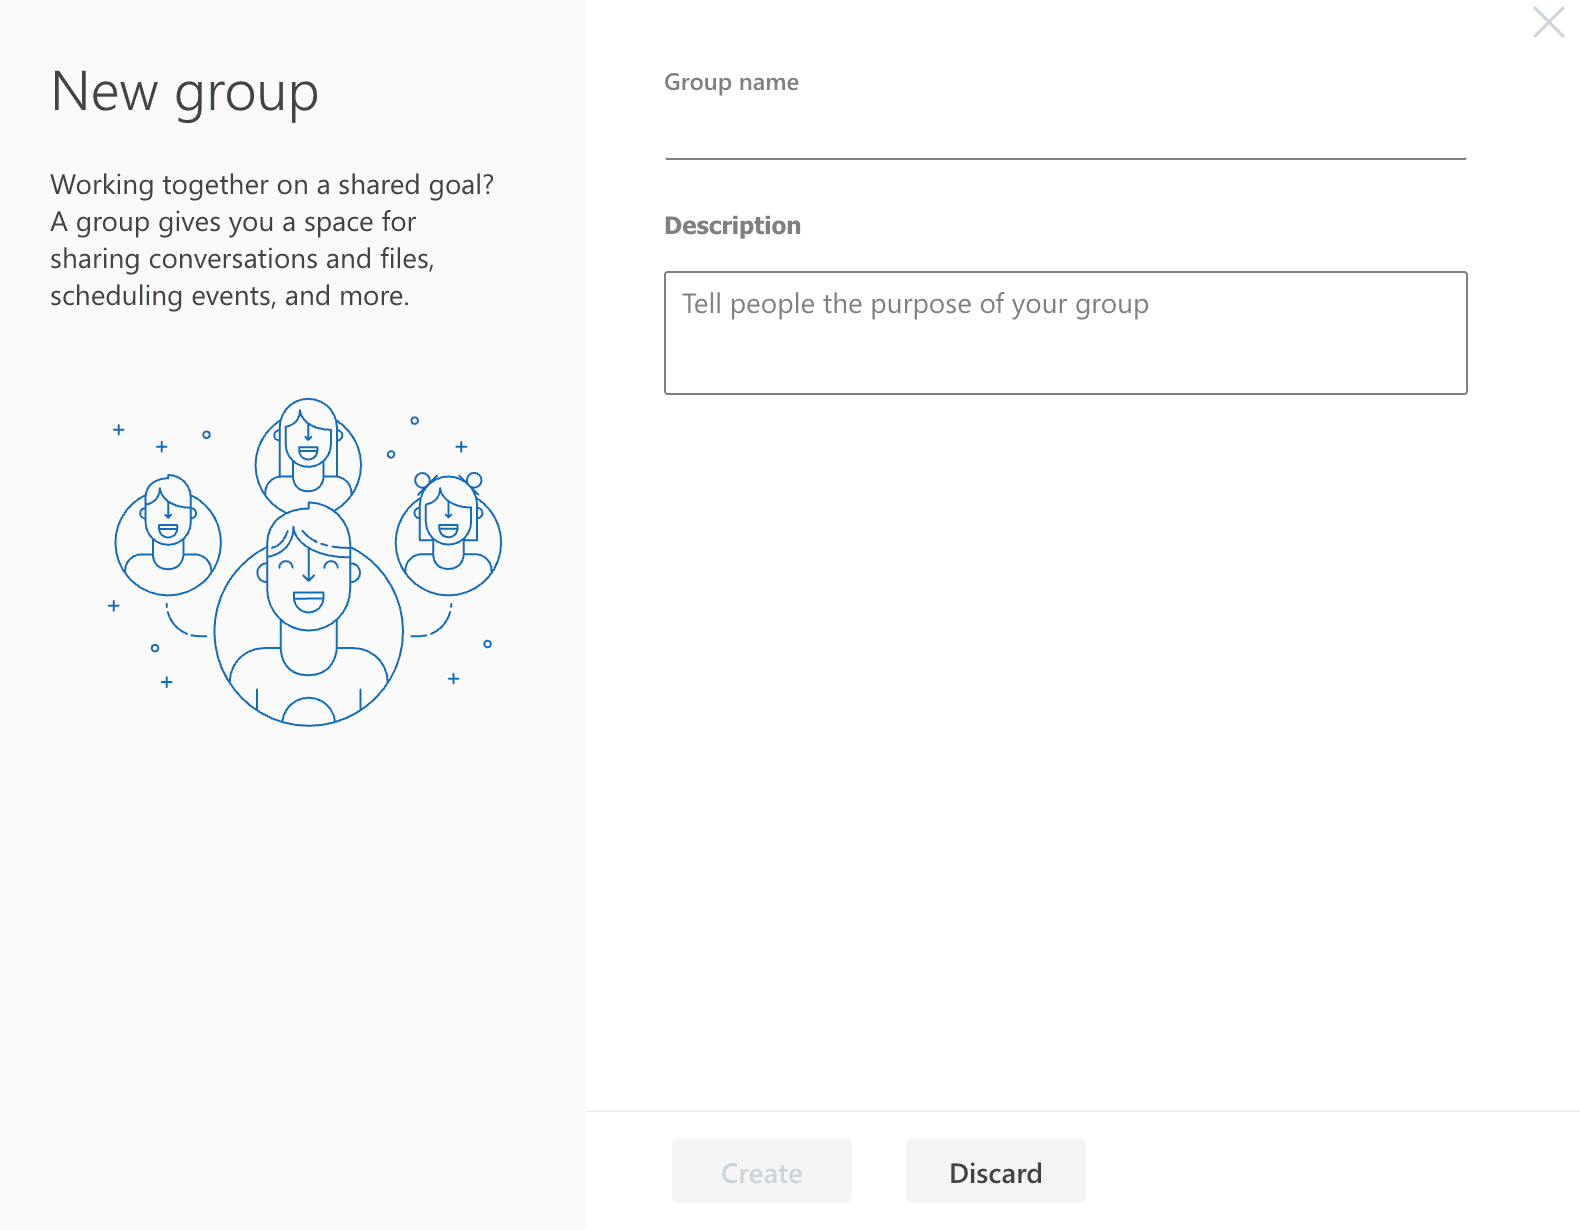
3. Name your group
In the window that opens, type a clear, recognizable name, such as Marketing Team or Client Updates Q4.
4. Add members
Click Add Members, then choose where you want to add contacts from:
From Outlook Contacts to include people in your existing address book. Double-click to add a single contact, or hold down the Ctrl or Command key to select multiple contacts to add. You can also add any existing email groups that you have previously set up on Outlook.
From Address Book for organization-wide contacts
New Email Contact to manually add external recipients
5. Save your group
Once your list is complete, click Save & Close.
Tip: Keep your groups small and specific, such as “Client A project team,” rather than large and generic. It makes updates faster and more personal.
How to make an email group in Outlook (web)
The Outlook web version works a little differently, with a cleaner, more streamlined layout that makes it easy to build and manage contact lists from any browser.
1. Go to Groups
Go to Outlook.com and sign in to your account. In the left-hand navigation menu, scroll down and select Go to Groups to open your group management options.
2. Create a new group
At the top left of the screen, select New Group to start creating your email group.
3. Name the group and add a description
Give your group a clear, recognizable name, then add a short description that explains its purpose so members know exactly what it’s for.
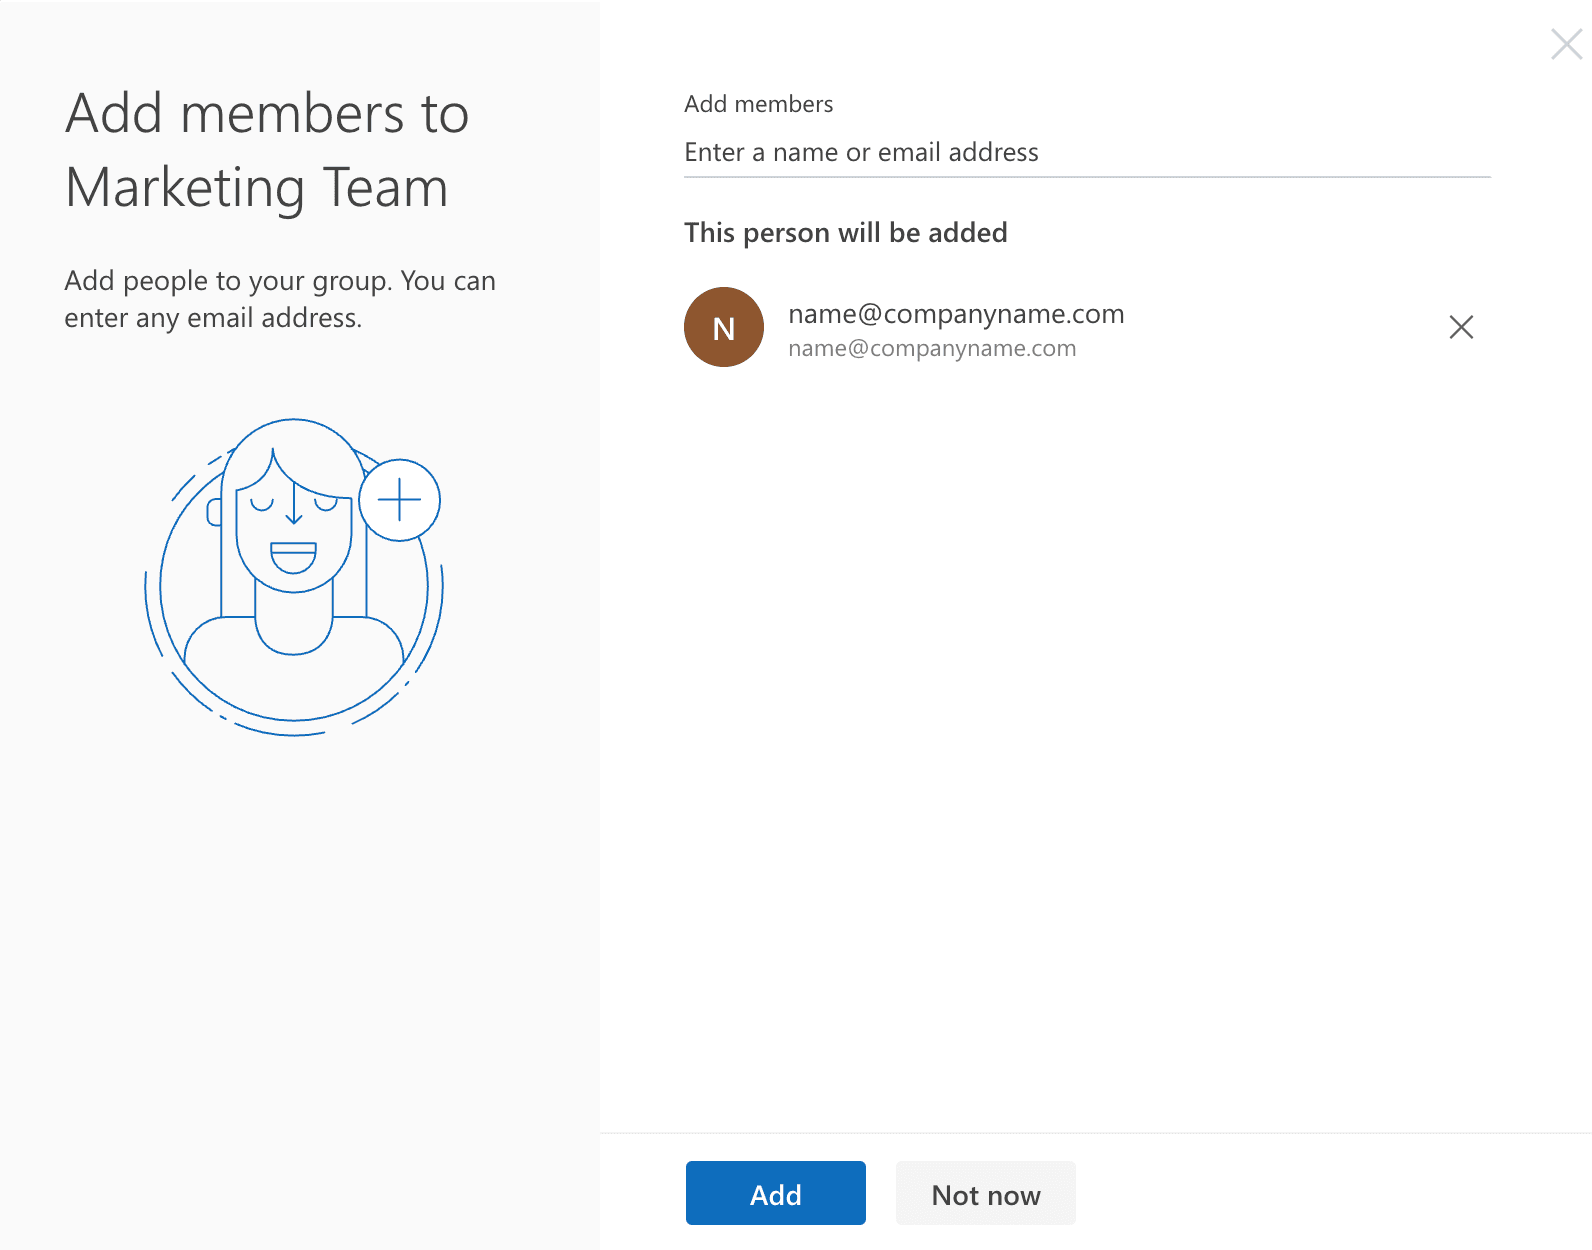
4. Add members
On the next screen, choose the people you want to include in your email group. Outlook shows your most frequent contacts first, but you can also start typing a name or email address to search. Click each contact to add them, and you’ll see their details appear under This person will be added.
5. Click Add
When you’ve finished adding members, select Add at the bottom of the screen. Your new group will be created instantly, complete with its own email address ending in “groups.outlook.com.”
How to make an email group in Outlook (mobile app)
Outlook’s mobile apps for iOS and Android make it easy to stay connected, but they currently do not allow you to create new contact groups directly on your phone. You can still send messages to existing groups or access any lists you’ve already created through the desktop or web version once they sync to your mobile device.
If your organization uses Microsoft Exchange or Microsoft 365, the way contacts sync between devices may be controlled by your IT administrator. In some cases, it might take a few minutes for new groups to appear in your mobile app. To speed things up, try refreshing your contacts or restarting the app to trigger a new sync.
Tip: You can also create shortcuts by saving frequent group emails as favorites in Outlook mobile for faster access.
How to send group emails in Outlook
Once your group is set up, sending a message to everyone at once only takes a few seconds.
Open a new email.
In the To field, start typing your group’s name. Outlook will suggest it automatically.
Write your message and click Send to deliver it to every member.
You can personalize your message before sending by adding CC or BCC recipients as needed. If someone in the group doesn’t need to receive that particular email, click the group name to expand the list and deselect their address.
For team coordination, you can also use Outlook’s Scheduling Assistant to plan meetings with the same group, keeping communication and scheduling in one place.
Keeping your email groups current is essential for clear communication. Regular updates help ensure your messages reach the right people and prevent outdated contacts from cluttering your list. Whether you’re managing a small project team or a company-wide group, Outlook makes it simple to edit, update, or remove members as your team changes.
Edit or update a group
Desktop: Open the People view and double-click the group you want to update. You can add or remove members, then click Save & Close to keep your changes.
Web: Go to People → Contact Lists → Edit, make your updates, and select Save.
Mobile: Editing is not supported. Mobile users will need to use either the desktop or web version to make changes.
To remove a member from an existing group
Go to the Members section within the group and select the person you want to remove. Choose Remove Member from the top menu, then click Save & Close when finished.
To add another member to an existing group
Open the Members section again, click Add Member, and search for the contact you’d like to include. Select their name, then choose Save & Close to finalize your update.
Delete a group
If you no longer need a group, you can delete it in just a few steps.
Desktop: Open People, select your group, and choose Delete Group.
Web: Click Go to Groups, then the Edit Group pencil icon next to your group’s name. In the pop-up window, select Delete Group in the bottom-right corner.
A confirmation box will appear to verify that all group content will be deleted. Tick the checkbox to confirm, then select Delete to remove it permanently.
Deleting a group only removes the list itself — your individual contacts will still be saved in Outlook.
Tip: Review your contact lists every few months. Remove inactive or duplicate contacts, update job titles if needed, and double-check external recipients to make sure you have permission to contact them. Regular maintenance keeps your communication accurate and your inbox efficient.
What’s the difference between a Contact Group and a Microsoft 365 Group?
A Contact Group (also called a Contact List) is designed for quick, one-way communication. It stores a set of names and email addresses so you can send a message to multiple people at once without adding each contact manually.
A Microsoft 365 Group, on the other hand, is built for collaboration. It includes a shared inbox, calendar, and document library through SharePoint, along with Microsoft Teams integration for ongoing projects and conversations.
If your goal is simply to send updates or announcements, a Contact Group is all you need. If you want to manage shared work, meetings, or files in one place, a Microsoft 365 Group is the better choice.
Can I share my Outlook contact group with others?
Yes. You can export a Contact Group by dragging it into an email and sending it as an .msg file. Recipients can drag it into their own Outlook to add it. This is a quick way to share team contact lists or ensure colleagues are using the same updated version.
Why can’t I create a group in the mobile app?
The mobile app focuses on sending and managing messages, not building contact lists. To create a new group, use Outlook desktop or web, then sync it with your mobile app. Microsoft may expand these features in future updates, but for now, group creation works best on larger devices where full contact management is supported.
Is there a limit to how many contacts can be added to a group?
Yes. Outlook supports up to around 500 recipients per message for most accounts. For large organizations using Microsoft 365, administrators can adjust this limit. It’s a good idea to keep groups smaller where possible to avoid delivery issues and ensure smoother email performance.
Can I send group emails to people outside my organization?
Yes, you can include external contacts in your Contact Group or Microsoft 365 Group, depending on your organization’s settings. Always ensure that sharing information with external addresses complies with your company’s privacy policies.