An email signature is essentially your digital business card. It tells people who you are, what you do, and how to reach you. Whether you’re sending one email a week or fifty a day, a clean, consistent signature makes your messages look polished and professional.
Microsoft Outlook makes it easy to add, edit, or switch between multiple signatures, whether you’re using the desktop app, Outlook on the web, or the mobile app. In this guide, we’ll show you how to add, create, and change your Outlook email signature step by step, with handy examples, best practices, and quick fixes when things don’t look quite right.
Why your Outlook email signature matters
A professional email signature reinforces credibility and makes communication smoother. It provides your name, title, contact information, and company details in one quick view — saving everyone time.
It matters more than you might think. According to a Crossware365 study, 47% of recipients feel more confident about a company when its emails include a branded signature, and 37% felt more inclined to respond to an email with a branded signature.
Similarly, research from Mailtastic’s eye-tracking study found that professional signatures and banners increased engagement without distracting from the main message.
The takeaway: a strong signature builds trust and helps your emails stand out — especially in busy inboxes.
Fyxer organizes your inbox and drafts replies in your voice.
How to add a signature in Outlook (desktop app)
If you use Outlook on Windows or Mac, here’s your step-by-step guide of how to create or update your email signature:
1. Go to File → Options → Mail → Signatures
Click File in the top-left corner, then select Options. Choose Mail in the sidebar, then Signatures
2. Create a new signature
In the Signatures and Stationery window, click New. Name your signature (e.g., “Work,” “Personal”) and select OK.
3. Add your details
Type your name, job title, company name, and contact information in the text box. You can also include your phone number, email address, website, and office location if relevant. For client-facing roles, consider adding your LinkedIn profile, booking link, or working hours to make it easier for people to reach you.
If you’re part of a larger organization, include your company logo or department name for consistency with brand guidelines. Just keep it balanced — every line should serve a purpose and make it easier for the recipient to identify or contact you.
4. Format your signature
Use the formatting toolbar to adjust font size, style, color, and alignment so your signature looks professional and easy to read. You can also add hyperlinks to your website, social profiles, or scheduling page — just make sure they’re short and relevant.
If your company has brand guidelines, use the approved font and color palette for a consistent look. To personalize further, you can include a small company logo, accreditation badge, or pronouns (e.g., she/her, they/them) if you’d like. Avoid overloading your signature with too many colors, icons, or large images — subtle formatting looks cleaner and performs better across devices.
5. Set when it appears
Under Choose default signature, select which signature should appear on New messages and Replies/forwards.
6. Click OK to save
Your new Outlook signature will now appear automatically when you compose an email.
How to add or change your signature in Outlook web (Outlook.com or Office 365)
If you use Outlook.com or Microsoft 365 in your browser, the process for creating or updating your email signature is slightly different from the desktop app. Outlook on the web saves your signature to your online account, which is handy if you switch between different computers or browsers.
While the desktop version allows more advanced formatting and image embedding, Outlook web focuses on accessibility and simplicity — giving you everything you need to create a clean, professional signature that syncs across your online sessions. (Note: signatures created here don’t automatically sync to the desktop or mobile app, so you’ll want to create consistent versions manually on each platform.)
Click the Settings (⚙️) icon in the top-right corner.
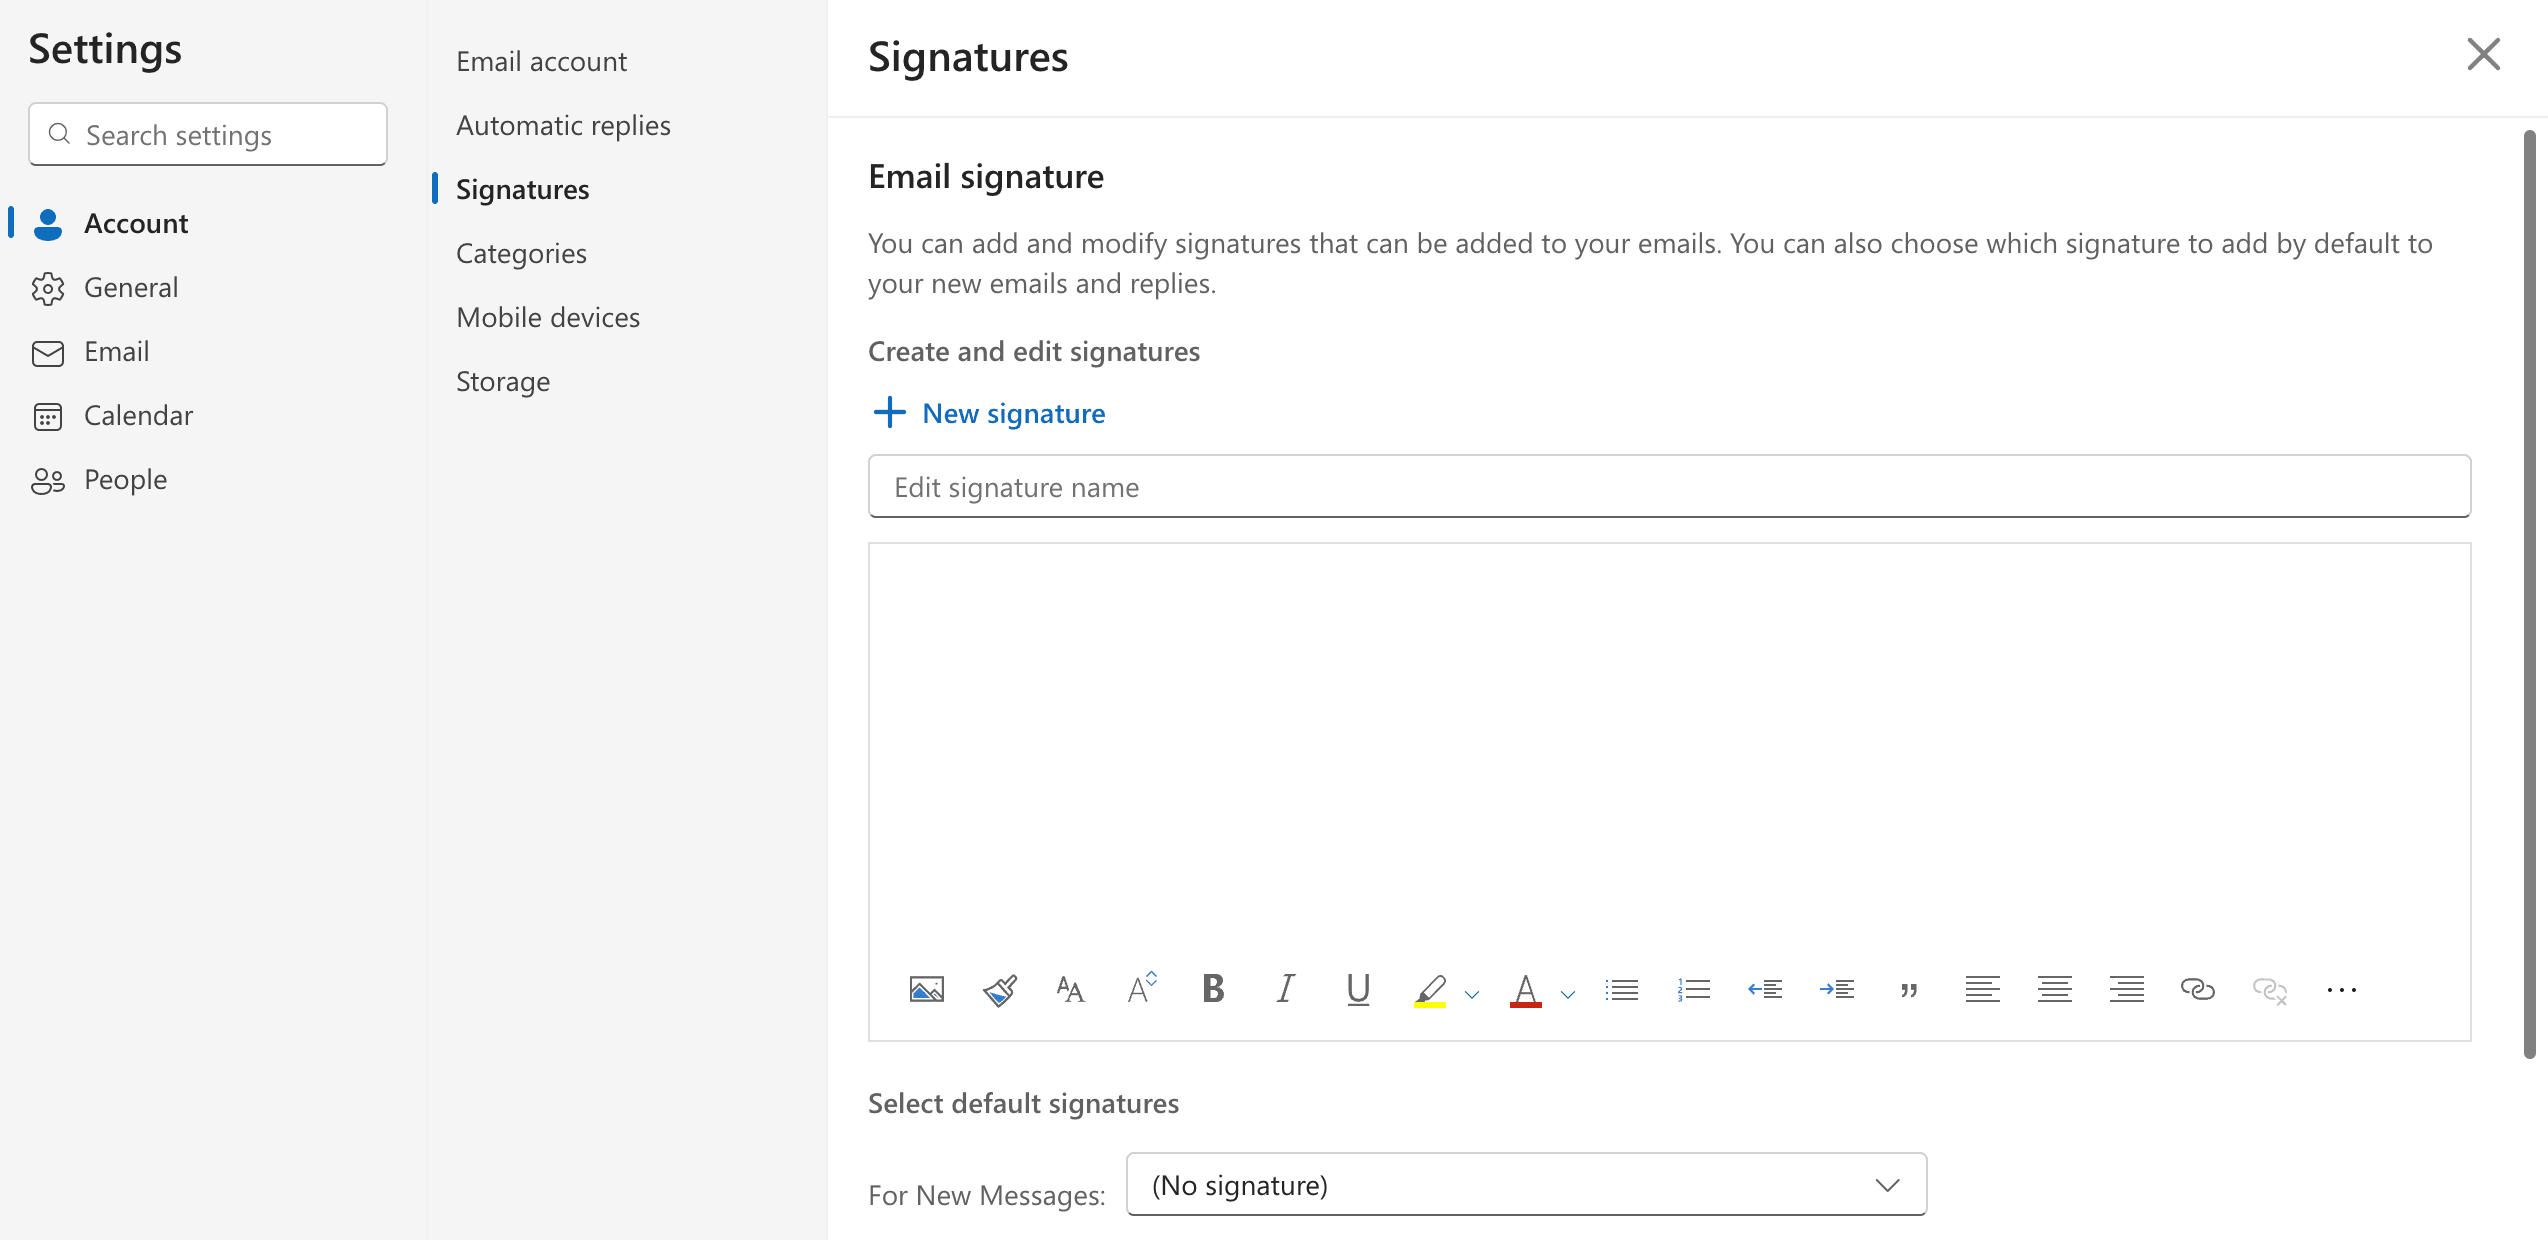
3. Select Account → Signatures
On the left-hand menu that appears in the new pop-up box, open the options for Account, then click Signatures.
4. Add a name for the new signature
In the textbox reading Edit signature name, add a name for your new signature, like “Work,” “Personal,” “Client Replies,” or “Out of Office.” Choose something clear that helps you recognize which signature to use at a glance.
5. Add your details
Enter your details just as you would in the desktop version — your name, role, and key contact information.
6. Format your signature
Format your signature just as you would in the desktop version — adjust fonts, colors, and alignment for a clean, consistent look. You can still add links, logos, or other small details to match your company style, but keep formatting simple so it displays well across browsers and devices.
6. Set when it appears
Under Select default signatures, select which signature should appear on New messages and Replies/Forwards.
7. Click OK to save
Your new Outlook signature will now appear automatically when you compose an email.
How to add or change your signature in Outlook mobile
By default, Outlook’s mobile app adds a simple “Sent from Outlook for iOS/Android” sign-off. Here’s how to replace it with your own signature:
1. Go to Settings
Tap your profile picture or initials, then select the gear icon (⚙️) at the bottom of the menu.
2. Tap Signatures
Scroll down to find the Signatures section under Quick Settings.
3. Add your signature
Replace the default message “Sent from Outlook for iOS/Android” and add your own short, clear sign-off. Outlook mobile only supports plain text, so skip images, logos, or fancy formatting — simple always looks best here.
4. Save by tapping ✔️
Once you’re happy, simply tap the ✔️ on the top-right corner to save your Outlook mobile signature.
Outlook signature examples and templates
Here are simple templates you can copy and personalize for your own signature:
Corporate or business
Ideal for company emails, this format includes your key contact details, job title, and relevant links — polished, professional, and ready for client communication.
If you work independently, this version helps showcase your personal brand. Add your website, social handle, or booking link so clients can reach you easily.
Thanks,
Riley Patel SEO & Content Consultant 📅 Book a 15-min call | 🌐 rileypatel.com @rileypatelwrites
Minimalist
A clean, no-frills option that’s easy to read and ideal for Outlook mobile signatures. Short, professional, and to the point.
Best,
Jordan Kim Product Designer | Company Name
Keep your design simple, stick to standard fonts, and double-check that any links or images work before sending.
Best practices for professional email signatures
A good email signature is clear, brief, and brand-aligned. These best practices help ensure yours works well across every inbox.
Keep it concise: Limit it to three to five lines. Include essential details: your name, title, company, and contact links.
Use consistent formatting: Stick to common fonts like Arial, Calibri, or Helvetica. Avoid script fonts or excessive colors that can break on mobile.
Optimize for mobile: According to MailerLite’s research, over 41% of all email opens happen on mobile devices, so your signature needs to look clean and readable on small screens. Use shorter line lengths and minimal formatting.
Add your logo thoughtfully: Logos add credibility, but keep file sizes small (under 100 KB) to prevent slow loading. Host images online rather than embedding them.
Include relevant links: Direct readers to your website, scheduling page, or LinkedIn — but avoid cluttering your signature with unnecessary social icons.
Keep branding consistent: Research from Signitic shows that optimized, on-brand signatures can increase click-through rates by around 22%. Keep colors, fonts, and layout aligned with your company’s identity.
Update it regularly: Whenever your role, contact details, or branding changes, update your signature to keep it current and accurate.
Assign different signatures to different inboxes: If you manage more than one inbox, you can assign unique signatures to each account — ideal for separating personal and professional communication.
Outlook email signature FAQs
How do I add multiple signatures in Outlook?
Click File → Options → Mail → Signatures, then select New to create more. You can switch between them using the Message → Signature button when composing an email.
Can I use HTML or images in my Outlook signature?
Yes — Outlook for desktop and web supports HTML, links, and images. The mobile app only allows plain text, so keep that version simple.
Why isn’t my new signature appearing in emails?
If your updated signature isn’t showing, try these quick fixes:
Check default signature settings: Go to File → Options → Mail → Signatures and ensure the correct one is assigned to new messages and replies.
Verify your account: Make sure you’re editing the right account if you manage multiple inboxes.
Sync manually: Outlook doesn’t sync signatures automatically across desktop, web, and mobile. Set each up separately.
Remove extra formatting: Copy-paste plain text into the editor, then reapply styling within Outlook.
Restart Outlook: This often clears display glitches.
How do I remove or reset my signature?
Open your signature settings, then either delete the text directly or choose “None” under your default signatures. This removes it from new emails and replies, giving you a clean slate if you’re updating or starting fresh.
Does my signature sync between Outlook devices?
No — Outlook doesn’t sync signatures between devices. You’ll need to set them up separately on desktop, web, and mobile to keep everything consistent. It only takes a few minutes and ensures your emails look professional wherever you send them from.